
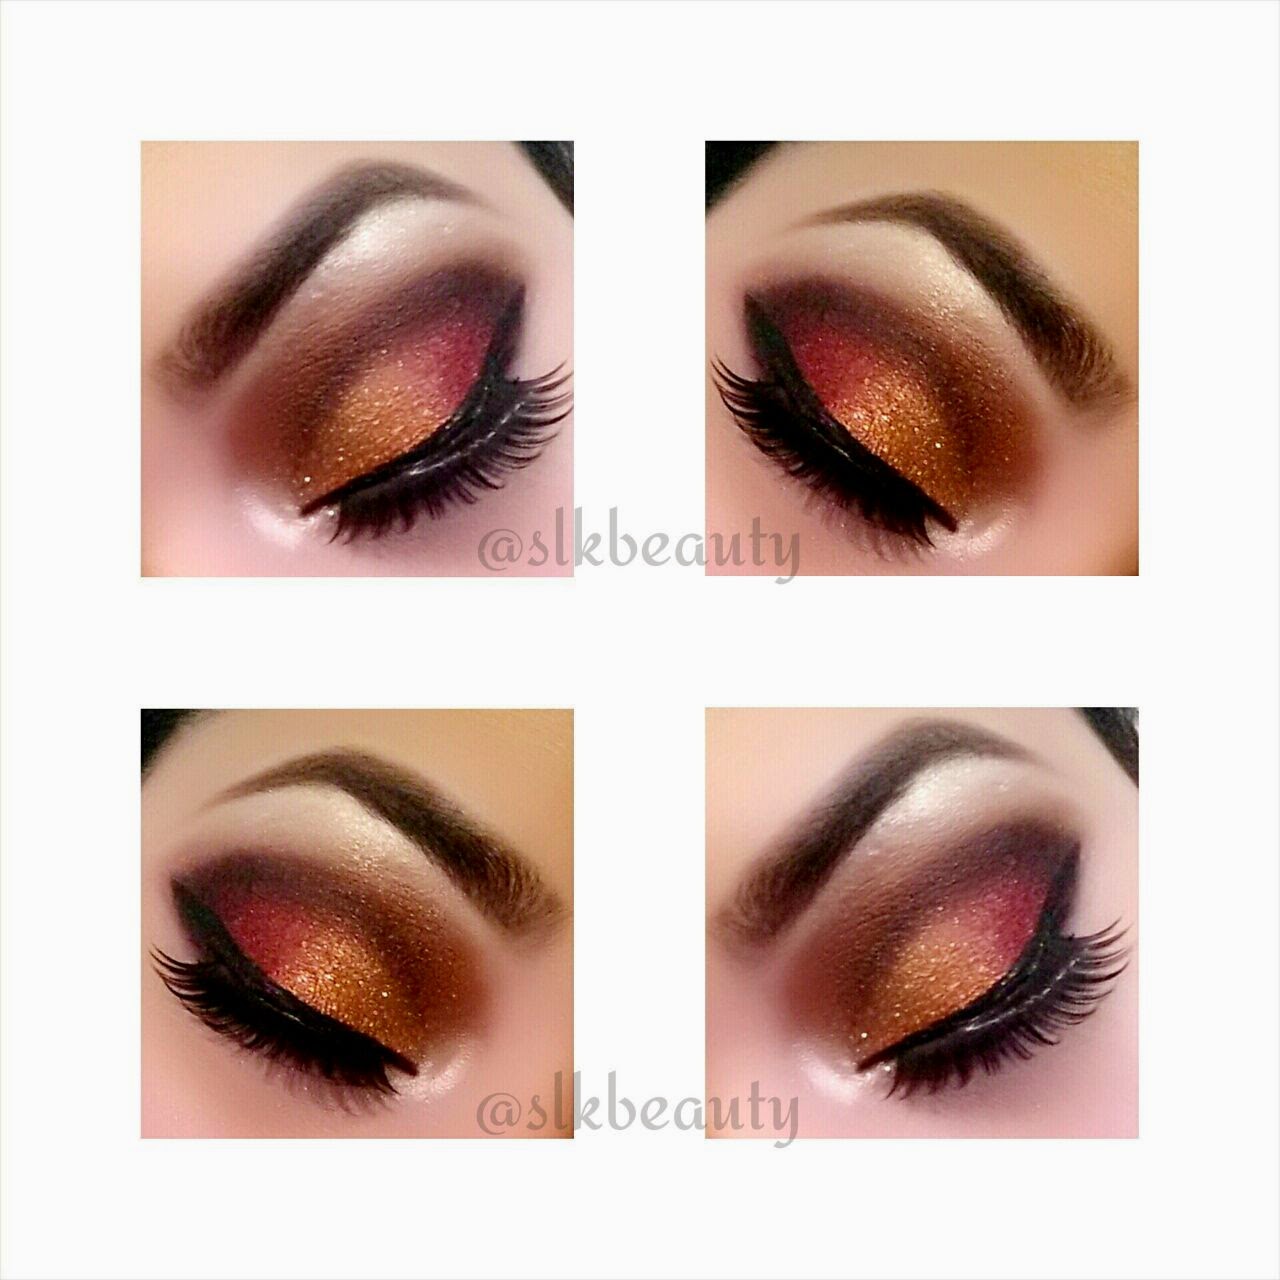
Here's what I call a traditional Asian bridal makeup. It's a very red and gold look with a hint of glitter.
1. Prime
As always prime the eyelid, all the way to the brows (Lorac Behind The Scenes).
2. Base
You'll need a flat synthetic brush for this step
- Apply a white (NYX pencil in Milk) base under the brows (brow bone) and carve out the brows, as well as pulling it down slightly towards the crease. But don't take it all the way to the crease.
- Apply the same white base around the tear duct area.
- Apply a gold base (Maybelline colour Tattoo in Gold Rush) all over the lid, up to the crease.
At this stage you should have a base on the brow bone, tear duct area and the lid. The only area that wouldn't have base is the crease.
3. Highlight
With a flat shadow brush apply a light shimmery shadow (Nude from Lorac pro palette) on the brow bone and tear duct area (over the white base).
4. Crease
With a tan eyeshadow (Sable from Lorac pro palette) on a blending brush deepen the crease. Brush it on using a windshield wiper motion, from the outer corner to the inner corner. Blend it into the highlight colour.
5. Lid
- With a flat shadow brush apply a shimmery gold to the inner half of the lid.
- Then apply a shimmery or matte red on to the outer half of the lid. slightly overlap the gold.
- Using the blending brush from step 4 blend out the crease again (with no additional shadow).
6. Definition
Now we want to add more definition by further deepening the crease and the outer corner.
- Using a pencil brush apply some black shadow to the outer corner (side ways V shape).
- Take that black in to the crease, almost drawing in a crease as you would for a cut crease look.
This will give the lid some dimension.
7. Lower Lash line
- With a pencil or a smudge brush apply the red to the lower lash line
- Blend it out using the tan blending colour.
8. Liner
- With a liner brush of your choice draw on the winged liner. Create a wing, taking it to the crease level.
- Apply the same gel liner to the water line and the lower lash line, all the way to the inner corner
9. Glitter
For this look I didn't go too crazy with he glitter, as I wanted the red to be the star of the show. So take a tiny amount of glitter on to your ring finger and apply just over the gold shadow.
10. Lashes
- Apply mascara to the lashes
- Put on lashes of your choice
All done now!
Do let me know if you try this look out and if you've found this easy to follow.
Thank you so much for stopping by. Have a great day.
xxxxxxxxxxxx :)
**I am not affiliated with any of the brands mentioned on this post. These are products I have purchased myself and enjoy using**
No comments:
Post a Comment